When monetizing a blog most people tend to put up a bunch of 125×125 pixel ads, something of an unofficial standard. I believe this is Michael Arrington’s doing, the relaunched version of TechCrunch (which we’re seeing an updated iteration of today) introduced this in a wider scale, at least to me, and bloggers happily jumped on the bandwagon.
The concept is sound, 125×125 pixel ads aren’t obtrusive, they’re small, lightweight, but still gets the message out there.
Problem is, when putting 8 or even 10 of these in a two column layout you’ll get a cluttered block that looks worse than a set of larger ads would.
The New Format?
But maybe there’s a new format in town to gain ground. The GigaOm network runs 300×100 pixel ads in their sidebars, which looks clean compared to the 125×125 pixel ones found on TechCrunch.
While I think 300×100 pixels is a pretty decent size, design-wise, I believe it is better to look at what default sizes are being offered and sold by ad networks. The closest one is the not so common 250×120 pixels, the half square ad (being 250×250 pixel, or sometimes 250×240 pixels, hence the “half” part). This is an ad that works well in sidebars as well, without being to obtrusive.
Incidentally, both these ad formats (300×100 pixels and 250×120 pixels) offer the advertiser a total of 30,000 pixels to work with.
The Future of Blog Ads
With blogs being more like traditional websites, we’ll see more traditional ad formats. That’s the good thing with the 125×125 pixel ads, there are several mainstream ad networks (such as Google Adsense) that will offer this size, whereas 300×100 pixels is something of an in-house creation from Giga Omni Media. I do think that 300×100 pixels is a better aspect than 250×120 pixels, but when running the latter I’ve been able to get media agencies to push out ads on my site, rather than having to have the one odd ad spot breaking my design.
Big shot blogs are already running traditional ad sizes, just look at the Gawker (Lifehacker, Gizmodo and more) and Weblogs Inc. (Engadget, TUAW and more) blogs out there. This is because they reach a mainstream audience (as opposed to the TechCrunch ones, for instance), and that mainstream advertisers used to the traditional ad formats.
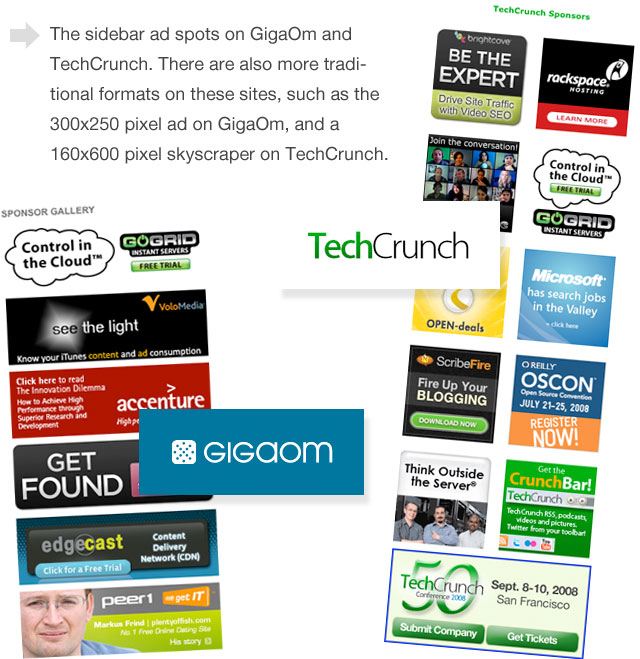
Both the TechCrunch and the GigaOm network are running traditional ad spots as well, with the leaderboard ad (728×90 pixels, “the new banner” size) being the most common ground here. They are also running squares, like the 300×250 pixel ad found in GigaOm’s sidebar, and the 160×600 pixel skyscraper ad on TechCrunch.
What’s Your Poison?
Think about this when you design the ad spots for your next blog.
- Is your crowd mainstream? If yes, look to traditional ad format.
- Is your crowd very much web 2.0 new media-ish? Then you won’t go wrong with either, and might even get away with a custom size if your readership is enough to get the advertisers to do custom ads just for you.
- Is your crowd the same as the blogosphere itself? Then stick to your 125×125 pixel ads for now, but be at the ready!
What ad sizes do you prefer, and why?


